我在Traccar安装中走过的坑
11月29日的时候看到了一篇关于Traccar的文章(用 VPS 搭建现代全功能 GPS 追踪系统 (Traccar)),正好手头有VPS,就想要测试一下,所以12月3日的时候开始了测试。下面是测试的过程和遇到的问题及解决方法,方便自己以后回忆使用。
官方提供的测试Demo
参考网址: Demo Servers
Demo server 4
Location: United Kingdom
Domain name: demo4.traccar.org
IP address: 46.101.24.212
Port number: device specific
如果是上方的信息,那么访问的网址就是 http://46.101.24.212:80 手机端服务器地址为:http://46.101.24.212:5055
我的VPS系统配置
IP
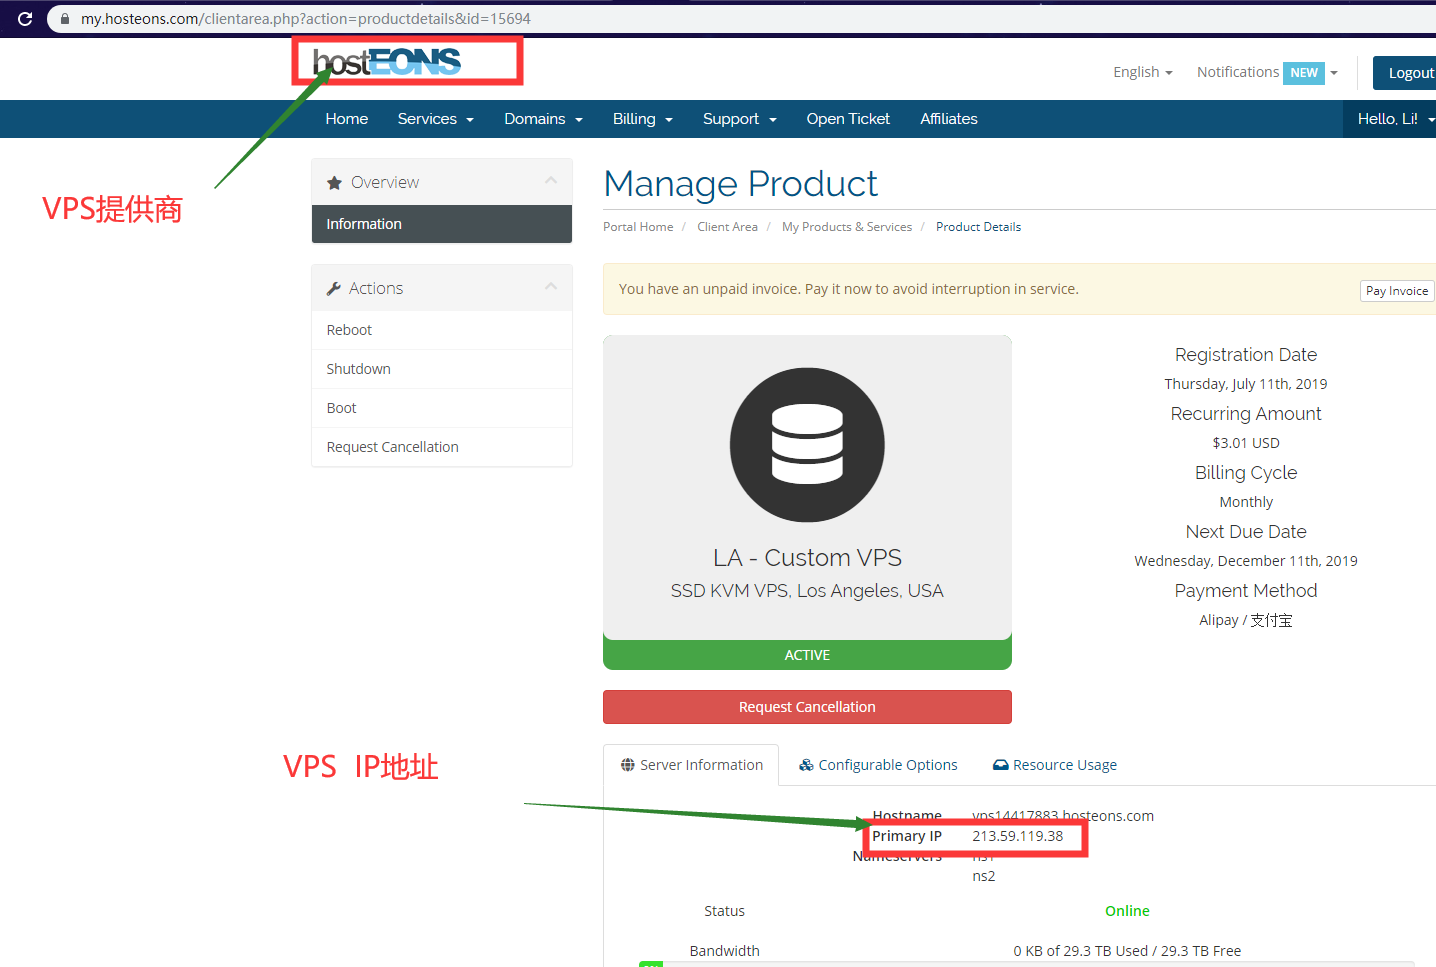
VPS 操作系统
Traccar安装过程
参考官网安装过程 Traccar官网安装过程
过程如下:
You can use commands below to install Traccar on any Ubuntu server. It can be any VPS provider or even a local server.
Commands
#Update repository
apt-get update
#Install Java and MySQL server
apt-get install unzip default-jre mysql-server
#If you were not asked for MySQL password during installation process, run following command
mysql -u root -p –execute=”GRANT ALL PRIVILEGES on . to ‘root’@’localhost’ IDENTIFIED WITH mysql_native_password BY ‘root’; FLUSH PRIVILEGES;”
#Create “traccar” database (use password from previous step)
echo “create database traccar” | mysql -u root -p
#Download Traccar package for Linux
wget https://github.com/traccar/traccar/releases/download/v3.16/traccar-linux-3.16.zip
#Un-zip package
unzip traccar-linux-*.zip
#Install Traccar service
./traccar.run
#Create config file
nano traccar.xml
#Example configuration (replace password if needed)
<entry key="config.default">./conf/default.xml</entry>
<entry key='web.port'>80</entry>
<entry key='geocoder.enable'>false</entry>
<entry key='database.driver'>com.mysql.jdbc.Driver</entry>
<entry key='database.url'>jdbc:mysql://localhost/traccar?allowMultiQueries=true&autoReconnect=true&useUnicode=yes&characterEncoding=UTF-8&sessionVariables=sql_mode=''</entry>
<entry key='database.user'>root</entry>
<entry key='database.password'>root</entry>
<entry key='server.timeout'>120</entry>#Replace default config file
cp traccar.xml /opt/traccar/conf/
#Remove installer
rm -f traccar.run README.txt traccar-linux-*.zip
#Configure cron job to clear old logs daily (optional step)
printf ‘#!/bin/sh\nfind /opt/traccar/logs/ -mtime +5 -type f -delete\n’ > /etc/cron.daily/traccar-clear-logs && chmod +x /etc/cron.daily/traccar-clear-logs
#Start service (see Linux instructions for up to date commands)
/opt/traccar/bin/startDaemon.sh
#Check that service started correctly
tail -f /opt/traccar/logs/wrapper.log.*
安装过程中遇到的问题(真心难受,下次看安装教程一定要直接看官网!!!!!!!!!!)
编写教程的时候上传图片到github的过程(即使用git提交信息的过程(操作命令))
我使用到的操作命令: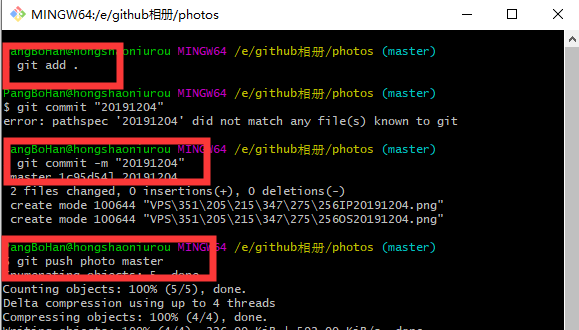
参考:git提交代码五部曲
Traccar安装使用到的操作命令
- nano
nano [选项] [[+行,列] 文件名]…
nano 是一个字符终端的文本编辑器,有点像DOS下的editor程序。它比vi/vim要简单得多,比较适合Linux初学者使用。某些Linux发行版的默认编辑器就是nano。 参考网址
- nano
- mysql -uroot -p 连接进入mySQL
输入密码:
show databases; 显示mySQL服务器相关设置
exit; 退出
(进入mySQL数据库后,所有的命令以;结束)
- mysql -uroot -p 连接进入mySQL
- netstat -nultp 查看服务器已使用的所有端口
在进行VPS上的Traccer安装过程中的分支——windows版本Traccer的安装
安装过程如下:
参考官网地址:Windows
该教程主要看视频介绍。
安装结束后配置手机端服务器地址(bug。自己没有好好看官网网介绍)
手机端下载Traccar,配置设备编码,配置服务器地址,配置位置精度,配置地位频率等
在配置服务器地址时,我直接使用了电脑浏览器搜索 ip 获得的ip地址,结果GPS数据发送失败。
查找原因后发现:服务器地址必须是 公网IP,不然无法访问
参考网址:分辨IP是公网IP还是内网IP的方法
通过上述方法查看发现,我自己的ip是内网ip,无法进行访问,所以上面的windows安装操作都是徒劳的。。。。
关于将自己的内网ip映射到公网ip这种操作,相关的网站有 花生壳 网站,但是这种服务是收费的所以就没有进行测试。在配置服务器地址时需要用到端口信息,具体参考下方网址:Supported Devices
If you are using Traccar Client app, you don’t need to look for your phone model in this list. Port for Traccar Client is always 5055.
对于手机app直接使用5055端口就行。
结论
我的Debian系统无法安装Traccar
windows版的Traccar可以安装但以为我的ip是内网ip所以无法收到手机传来的定位信息。也无法使用。